Canva vs CapCut comes up the moment you need to publish a video without losing a week to it. Both are usable for free at the start, both run on a phone and on a laptop, and both promise a publishable file in minutes. On paper it is a draw. In practice you hit the wall around the third project: one refuses the precision you ask for, the other cannot carry your visual identity.
The deciding factor is not the length of a feature list. It is the nature of what you publish every week. An account shipping posters, carousels and the occasional video has nothing in common with a channel shipping three vertical edits every seven days. This comparison sits on that ground, then asks the question most reviews skip: when does neither tool cut it any more. If browser based editing is still unfamiliar, our guide to online video editing covers the basics before this choice.
The short answer
Pick Canva when video is one asset among many, in a workflow where brand consistency matters more than editing precision. Pick CapCut when the video is the deliverable, especially vertical, with rhythmic cuts, animated captions and effects. Canva thinks in pages and templates, CapCut thinks in tracks and seconds. Both auto caption, both export without special hardware, and neither one creates the footage you never shot.
Two tools that start from different places
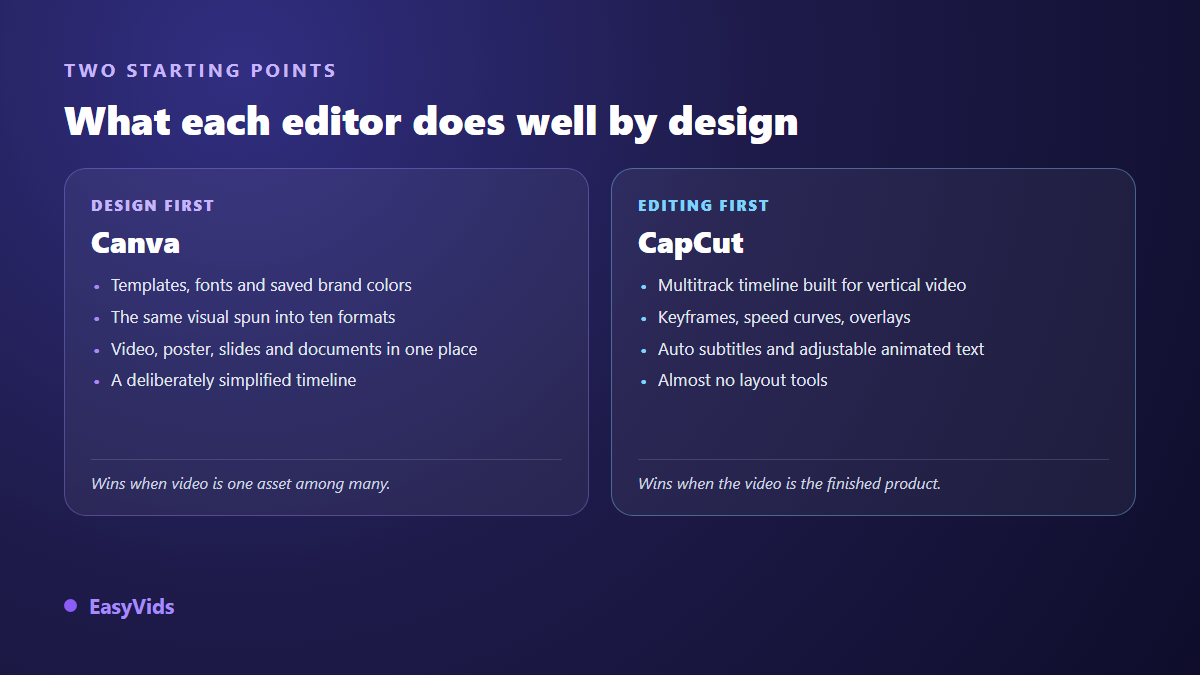
Canva began as a graphic design tool. Video was added on top, inside the same interface as posters, slide decks and documents. That origin explains everything else: you handle pages, you drag elements, you apply a brand kit, and the timeline stays deliberately simple. That is a decision, not an oversight.
CapCut comes from the opposite side. Published by ByteDance, the parent company of TikTok, it was designed for short vertical editing, on phones first. You get a multitrack timeline, keyframes, speed curves, compositing and a sound effects library. What it will never ask you is what your brand colours are. Each tool is excellent on home ground and rough as soon as it leaves it.
The timeline is where they split
Here is the test that settles it in thirty seconds. Open a project, drop in a music bed, then try to land a cut exactly on a beat. On a track based editor you zoom into the waveform, position the playhead, cut, check. On a page based editor you type a duration in seconds and hope. The gap looks trivial on one video. It becomes exhausting on the hundredth.
The same gap shows up in three very common moves: slowing a passage without wrecking the audio, easing an element in with a speed ramp, stacking three layers of moving images. Those moves need keyframes and stackable tracks. A design tool rarely offers them, because that is not what its users ask for.
Brand consistency is what CapCut simply does not have
Now flip the problem. You have to ship the same announcement as a square thumbnail, a horizontal banner, a vertical story and a newsletter graphic, with the same font, the same colours and the logo in the same place. A design tool handles that natively: a template library, saved brand colours, and resizing that keeps the layout instead of cropping at random.
An editing tool will let you redo the work four times by hand. That is not a technical weakness, it is a missing feature. If your week looks like that, the Canva vs CapCut question is already answered, and design wins. Teams working on shared files land on the same verdict, for a related reason: sharing and commenting are design tool territory.
Captions: the closest call
Both transcribe speech automatically and place captions on screen with ready made styles. This is where the gap has narrowed the most. The real difference is in the fine control: word by word chunking, highlighting the spoken word, exact placement above the platform interface, nudging a caption that drifts by a few tenths of a second. Those controls live on the editing side. Decide what you actually want in our guide to automatic captions, then check which one gives it to you without workarounds.
What free really covers on each side
Both offer a genuinely usable free tier, and both keep part of the catalogue behind a subscription. On the design side, premium elements, images, fonts and templates stay locked until they are unlocked, a behaviour the Canva help centre documents. On the editing side, several features that used to be open moved behind the Pro tier, as the plan comparison published by CapCut shows. The trap is never the headline offer, it is the feature you came to rely on that moves one morning. Our own plans live on the pricing page, and we do not restate them here because they change.
- Does the export carry an app watermark? It depends on the template and the elements used, not only on the tier. Export a full video and inspect the final file.
- Are imported elements cleared for commercial use? Music, fonts and templates can carry their own terms, separate from the editor's.
- Do your projects stay openable if you stop paying? A locked project is a lost project, even when the exported file is safely yours.
- Have the terms of service changed recently? They have moved several times at both companies, notably on the rights granted over uploaded content. Read the version in force before running a paid campaign through them.
- Can your device handle the render? An entry level phone stalls on long projects, whichever editor you choose.
Pick by need, not by feature list
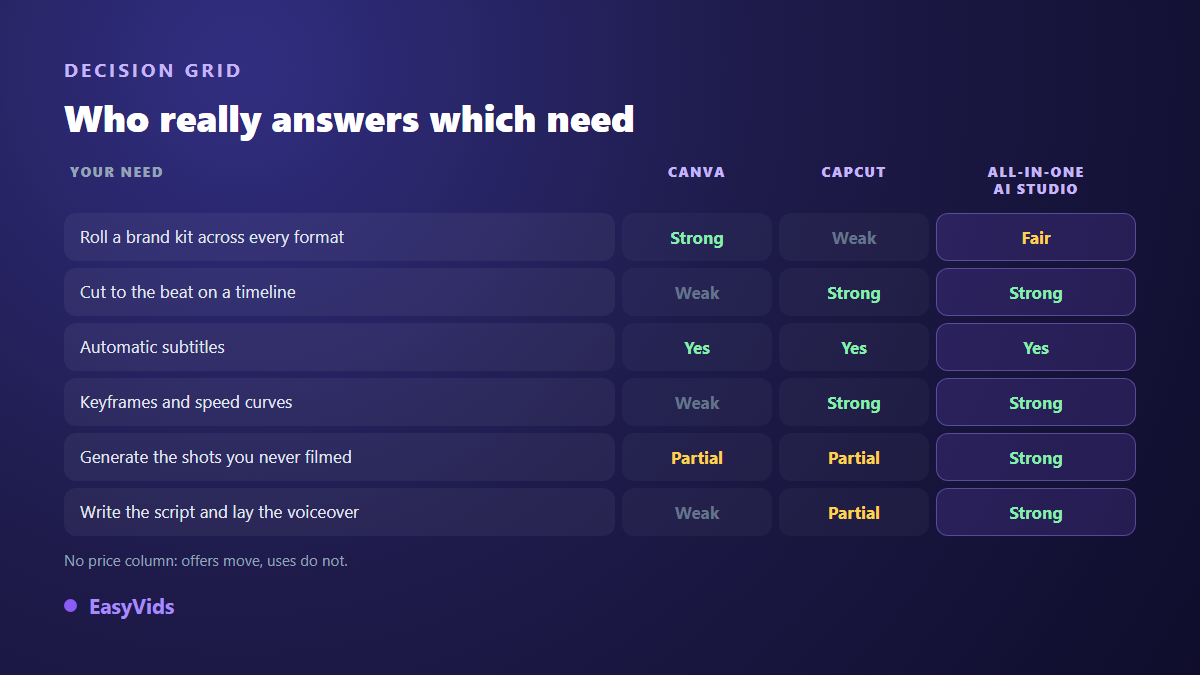
- A poster, a carousel and a short video on the same brand kit: the design tool wins outright.
- A rhythmic vertical edit with animated captions and sound design: the editing tool wins, comfortably.
- The same edit repurposed into three formats: a draw, both require manual work on the video.
- Several people working on the same project: the design tool, built for teams from day one.
- Editing from a phone between two meetings: the editing tool, born on mobile.
- Producing shots that do not exist yet: neither really answers, and that is where the subject changes.
The limit they share: they assemble, they do not create
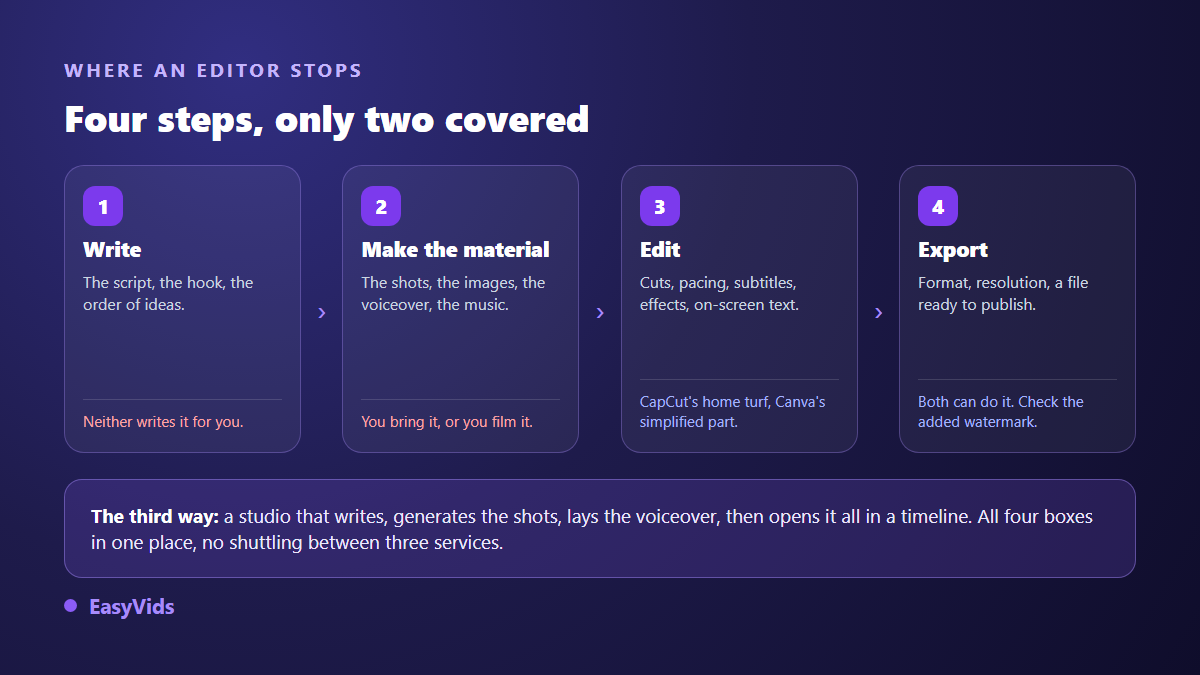
This is the point reviews leave out, and it is the one that costs the most time. Neither solves the starting problem: raw material. The script, the shots you never filmed, the voice over, an original music bed, the character who has to stay the same from scene to scene. Both have added AI features, mostly on images and text, but their trade is assembly. You arrive with footage, they help you put it end to end. A presenter talking to camera belongs to yet another family, the avatar tools, and the head to head between Synthesia and HeyGen shows what those services handle and what they leave out.
When there is nothing to assemble, the problem changes category. You need to write, split into scenes, generate every shot, lay a narration, and only then edit. That is the job of a full generator, and our guide to AI video generators walks that chain step by step. The same trade off between assembling and generating plays out among text to video tools, as our head to head between InVideo and Pictory shows.
The third way: generate and edit in one place
There is a way out that stops the choice altogether. An online studio that writes the script, generates the shots, lays the voice over and then opens all of it in a track based editor removes the constant round trip between three services. That is the approach behind the EasyVids studio: editing happens in the browser with nothing to install, on a multitrack timeline with keyframes, effects, masks, speed controls, stickers and a sound library.
Two honest caveats, because a comparison without limits is worthless. Our automatic transcription runs directly in the browser and covers nine languages: nothing is uploaded to a server to be captioned. Export, on the other hand, relies on browser codecs and stays unavailable on some mobile browsers, iPhone in particular. We say so before the render starts rather than let it fail ten minutes in. Output covers horizontal, vertical and square, in MP4 as well as WebM.
Frequently asked questions
Canva or CapCut for TikTok and Reels?
CapCut, in most cases. It was born on mobile and for vertical, its animated captions and sound effects match the codes of those platforms, and editing is faster. Canva still makes sense when the video must follow a brand kit exactly, or when it ships alongside a set of static visuals.
Can you use Canva and CapCut together?
Yes, and many creators do. The usual method is to build graphic elements on one side, export them as image files with a transparent background where the format allows, then import them into the edit. The cost is real: two subscriptions to track, a permanent round trip, and a painful correction loop whenever a graphic detail changes.
Are videos made with these tools cleared for commercial use?
It depends on the elements you used, not on the tool itself. Music, fonts and templates can carry their own terms, published in each service's licence pages. The safe rule fits in one line: before a paid campaign, check the licence of every imported element and keep a record of which version of the terms was in force when you edited.
Do you need to install software to edit a video?
No. Both services have a version that runs in the browser, and fully online editors exist. An installed app keeps an edge on very long projects because it uses machine memory more freely. For videos of a few minutes the browser is plenty, provided your mobile browser supports exporting.
Which one suits a complete beginner?
The design tool, if you start from zero and want a clean result without learning editing vocabulary. The editing tool asks for an extra hour of learning and repays it many times over once you publish regularly. The real beginner shortcut is the same either way: start from an existing project and change only the text and the images before touching any settings.
Canva vs CapCut is not a duel to settle once and for all: the question comes back with every project, depending on whether you are assembling or creating. The day you spend more time hunting for material than editing it, change tool category rather than editor. Creating an account opens the full studio, writing, shot generation, voice over and editing in one place, with no bank card.