You have a portrait of yourself on your phone and a message to deliver on video. Building an AI avatar from photo input looks trivial: upload the face, paste the script, let the machine handle the rest. In practice, a good share of first attempts produce a character who stops looking like you by the third scene, a mouth that drifts on the last words, or an outfit that changes without warning.
The cause is almost always the same, and it sits upstream of the generation itself: the source photo. This tutorial covers which image works, which one breaks the result, how to hold the same face from shot to shot, what these videos are actually good for, and the rule that applies the moment the face belongs to somebody else.
The short answer
Upload a sharp portrait, framed to the shoulders at least, in soft light and against a simple background. That image becomes the character's single reference: it is never redrawn, it is attached to every scene with an instruction to keep the same face. You then paste your script, it is split into segments of 6, 8 or 10 seconds, and each segment becomes a shot where the character speaks that text to camera. One rule outranks the rest: if the face is not yours, you need written consent before you generate anything. For the wider picture of the format, our complete guide to AI avatars and UGC videos approaches the subject from the other end.
What the studio actually does with your photo
Most people picture a training run: you hand over twenty shots, the system learns your face, then replays it forever. That is not what happens. You provide one image, it is stored exactly as supplied, and it is attached again to every generated scene along with an explicit instruction to keep the same face, hair and outfit from the first frame to the last. Nothing is trained and no personal model is built.
Two practical consequences follow. First, image quality outweighs every setting, because it is the only anchor the generator has. Second, you switch avatars by switching photos, with no waiting and no fresh start. In the EasyVids creation studio the photo is even optional: without one, a credible presenter is defined for you and serves as the reference in exactly the same way.
The source photo that works
A good reference photo is not a beautiful photo, it is a readable one. The generator cannot guess what it cannot see: every blurred, dark or cropped area gets filled with an invention, and that invention shifts from scene to scene. Four parameters decide nearly everything.
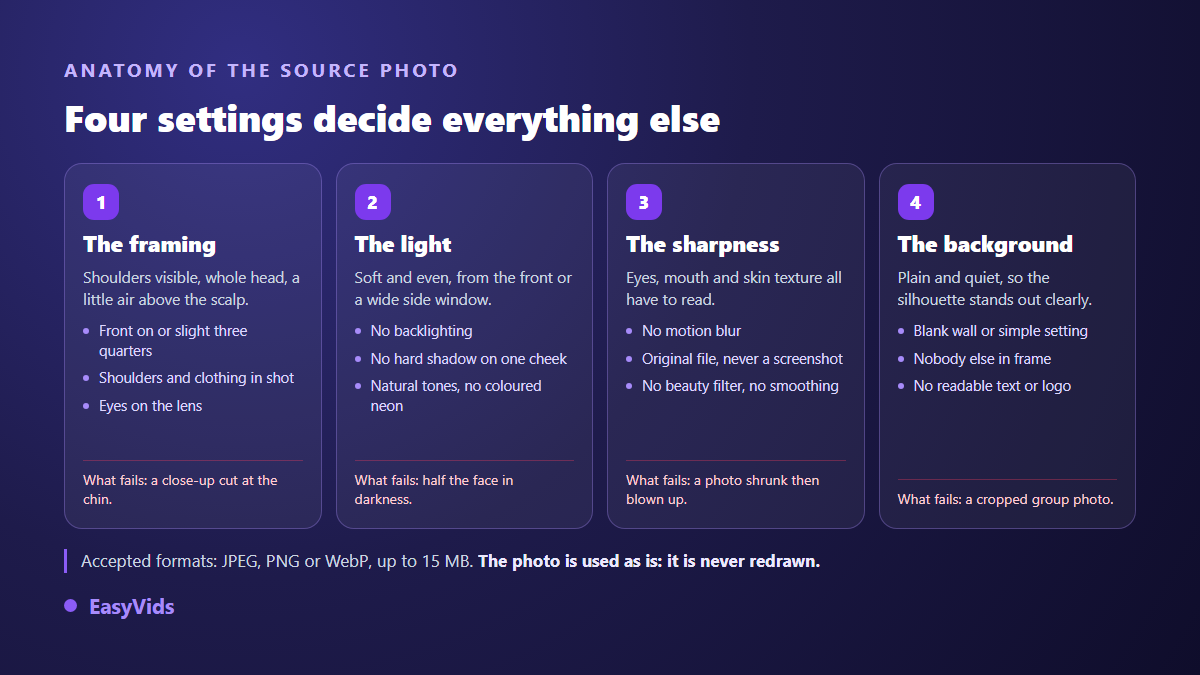
- A sharp face, front on or slightly angled, eyes open and visible.
- Framed to the shoulders at minimum, with a little headroom: a crop at the chin hides the build and the clothing.
- Soft even light from the front or a wide side window, no backlight, no hard shadow across a cheek.
- A simple quiet background, nobody else in frame, no readable text or logo behind you.
- No beauty filter, no skin smoothing, no automatic face retouching.
- A neutral expression or a light smile: this is a starting point, not the finished shot.
On the technical side, keep it simple. A JPEG, PNG or WebP file up to 15 MB covers the need comfortably. Prefer the original straight out of the camera over a screenshot from a story or a messaging app: every recompression costs skin texture and eye detail. If you hesitate between two images, keep the one where the eyes and the grain of the face read best, even if you like it less.
The photos that ruin the generation
Here is the exact opposite, drawn from the most frequent cases. None of these images is blocked on upload: they all go through, they simply produce an unstable character, and the flaw only shows up around the third or fourth scene, when it is hard to trace back to its real cause.
- The cropped group photo: the face ends up tiny and noisy once isolated.
- The backlit selfie in front of a window: the model only sees a silhouette.
- The strict profile shot: the generator has to invent the half of the face it never saw.
- The heavily retouched image: smoothed skin, enlarged eyes, redrawn jawline.
- The portrait with sunglasses, a low cap or a hand across the chin.
- A screenshot pulled from a video: it already carries motion blur and compression.
- An AI image generated from another AI image: the flaws stack with every pass.
One case deserves its own mention because it always surprises people: the beauty filter. Smoothed skin strips away the irregularities that make a face read as a real face. The generated character then looks younger, more plastic, and above all less like the original person. If your camera roll only holds filtered images, spend thirty seconds taking a fresh one near a window. The gain is immediate.
The tutorial, step by step
The whole route takes five moves, and only one of them really costs time: the writing. The rest is a handful of clicks, then production runs while you do something else. If your text already exists as a document, a one page brief or a course handout for instance, our method for turning a PDF into a narrated video saves you from rewriting it from the first line.
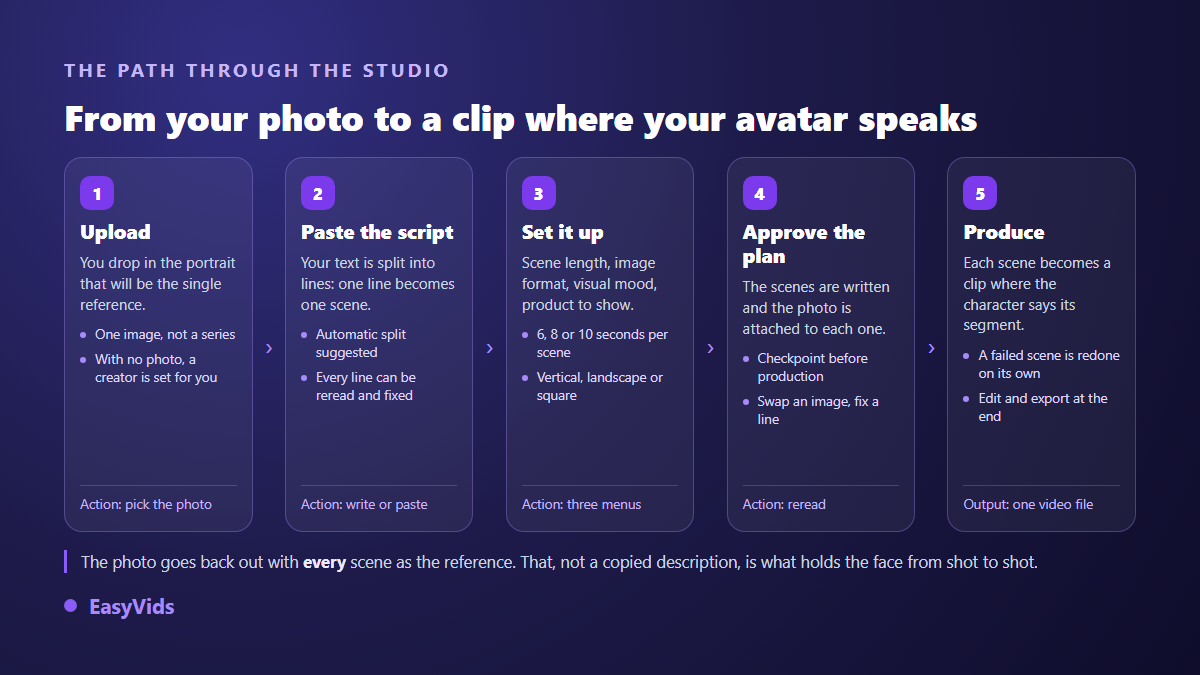
- Upload the photo. One image, chosen against the criteria above. Without a photo, a presenter is defined for you and stays consistent throughout.
- Paste the script. Your text is split into lines, one line per scene. An automatic split is offered, and every line stays editable.
- Set the scene. 6, 8 or 10 seconds per shot, vertical, landscape or square framing, a visual mood, and optionally a product to present.
- Approve the plan. The scenes are written and the photo is attached to each of them. You read, you fix a line, you swap an image if needed.
- Produce, then review. Each scene becomes a clip where the character speaks its segment. A failed scene reruns on its own, without redoing the series.
A word on duration, because it governs the writing more than people expect. Each scene is locked to 6, 8 or 10 seconds of speech, roughly fifteen to twenty five words. An overlong sentence is never sped up, it is split into two scenes. The constraint sounds harsh and quietly makes scripts sharper. If your starting point is a one line idea rather than a finished script, our method for turning written text into a TikTok video shows how to expand it just enough to fill a scene. This short shot logic runs through the whole chain, as we set out in our guide to the AI video generator.
Holding the same face across scenes
This is where most tutorials get it wrong. Consistency does not come from a description copied into every prompt. A description, however precise, gives you a convincing cousin: same age, same haircut, same style, but not the same person. Consistency comes from the image itself, resent unchanged with every shot, with an instruction to respect it. The techniques that extend that stability beyond a single video, across a whole series or a channel, are gathered in our guide to keeping a consistent AI character.
You keep control during production. A checkpoint shows the written scenes before the renders start: you can fix a line, replace the reference photo, or rerun a single shot. And if you realise halfway through that the direction is wrong, you can stop, with only the work already done being counted.
- Use the same photo from start to finish of a project: changing the reference mid way changes the character.
- Avoid abrupt lighting gaps between neighbouring scenes, which make face drift far more visible.
- Write the continuity into the script: same outfit, same place, or an explicit transition when you move.
- Prefer shots where the character moves naturally over static close ups, which expose the face longer.
- Cut illustration shots between spoken beats to break the monotony.
What fails, and why
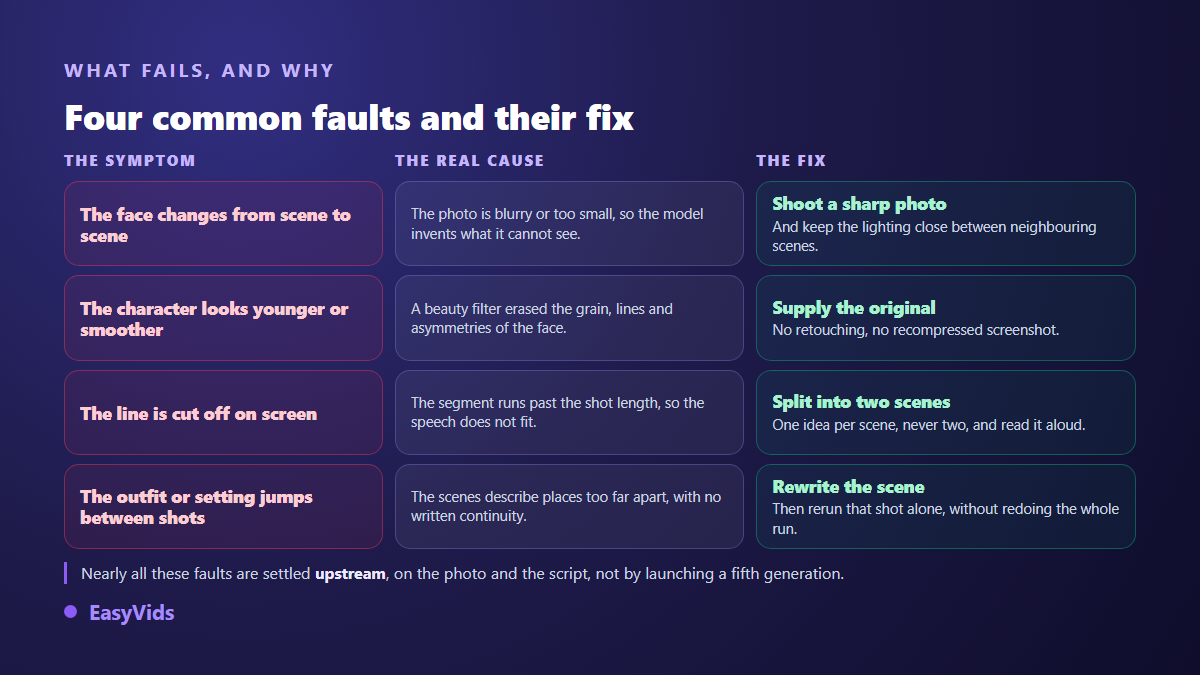
When a result disappoints, the temptation is to hit generate again and hope. That is almost always wasted time: the same input returns the same kind of output. Identify the symptom, trace the cause, and fix it where the problem was born.
Some honest limits remain. A generated shot runs a few seconds, so a long monologue is always a sequence of scenes and never a single take. Likeness is requested, never guaranteed: the instruction to hold the face reduces drift without removing it. Safety filters reject some shots, particularly anything resembling a public figure. And human review is still required: a failed scene is easy to regenerate, but somebody has to spot it. To gauge what these engines handle well today and what still defeats them, our selection of AI generated video examples shows the real level, case by case.
What these avatars are actually good for
The point is not to replace a video you could have filmed in ten minutes. The point is to produce what you would never have filmed at all: volume, variants, languages, and posts that do not require your physical presence. If you are wondering which format to start with, our round up of video ideas that need no camera lists the ones that work, with the method behind each.
- Running one advertising hook in several versions to see which one holds attention.
- Posting consistently on vertical formats without filming yourself several times a week.
- Producing one version per language by swapping the script text.
- Presenting a product held in hand rather than sitting on a table.
- Making short tutorials, customer question answers and product announcements.
- Testing a positioning before investing in a real shoot.
Product demonstration deserves a special note. You can attach the object's photo, its name and a short description, then add other angles of the same item so scale and material stay honest. The character then picks it up and presents it to camera. The same logic extends to a full channel, as we show in our step by step guide to a published YouTube video.
Written consent, the rule nobody gets to skip
Here is the section most guides handle in two lines, and it should open the subject. Making a real person's face speak without their agreement is not a grey area. Most legal systems protect a person's image and voice, and that protection does not vanish because the picture was regenerated by software. A photo found online, a customer, an employee, a relative who signed nothing: the answer is no every time. Get a written, dated agreement before the first generation, name the scope, cover image and voice separately, grant a withdrawal right, ban sensitive subjects, and archive the paperwork with the project. Never build a character resembling a public figure, and never present a generated character as a genuine customer testimonial.
Disclosing a generated video
Major platforms converge on the same requirement: realistic content generated or altered by AI must be flagged. On YouTube the declaration happens at upload, in the video attributes, and the official help pages target realistic scenes that never happened rather than minor edits such as colour grading or captions. On TikTok, the community guidelines on integrity and authenticity require a label on any AI content showing realistic looking people or scenes. Regulation points the same way: the European transparency obligations on content imitating real people apply from 2 August 2026, and the Commission guidance states that whoever publishes such a video must disclose it clearly, at first exposure at the latest. Ticking the box costs nothing, while skipping it can cost you the video. Our frequently asked questions cover the rest of the studio.
Frequently asked questions
Do I need several photos to build an AI avatar?
No. One image is enough, and that is the normal mode: it acts as the reference and travels with every scene. Adding ten photos would not make the character more stable. What changes everything is the quality of the single image you pick: sharpness, light, framing to the shoulders, simple background.
Can I use somebody else's photo?
Only with written, dated and scoped consent obtained before the first generation. A public photo, a stock library image or a customer portrait is not permission to make that person speak. A public figure's face is off limits in every case, humour included.
Why does my avatar stop looking like me after a few scenes?
In the vast majority of cases the reference photo is too small, blurred or retouched, and the model fills in what it cannot see. Take a sharp image in soft light, keep the same one for the whole project, and bring neighbouring scenes closer in mood. If a single scene drifts, rerun that scene rather than the series.
Can an avatar built from a photo speak several languages?
Yes. The character speaks the language of the script you provide, with no change of face. You produce one version per language by swapping the text, which makes an international rollout far lighter than a multilingual shoot. Budget questions are answered on the pricing page, which stays the only current source.
Do I have to disclose an avatar video on social platforms?
Yes as soon as the result is realistic, meaning a viewer could mistake it for real footage. Every major platform offers a toggle or a label at publication time, and the European framework requires clear information for the audience. Obviously stylised or fantasy content usually falls outside that duty.
Building an AI avatar from a photo is no magic trick: it is a short chain where every link depends on the previous one, and where the first link is an image you choose in thirty seconds. Get that image right, write scenes that fit inside a shot, review before you publish, and keep your consent paperwork current. The studio opens as soon as you create an account: start with your own face and a script of a few lines, then judge for yourself.