Your garments are photographed flat, on a hanger or on a foam bust. They sell less well that way, because nobody can picture themselves in a piece nobody is wearing. A shoot would fix it: a studio, a crew, someone to pose, a full day, then the whole thing again with the next delivery. An AI fashion model generator exists for exactly that reason, and it delivers on one condition, that your starting photo is good.
The principle is simple: your real photo works as a reference, and the model does not reinvent the garment, it puts it on a person. This guide walks the full method, from the product shot to the final check, including the limits worth knowing before you publish. It extends our guide to AI product photography, which covers the product on its own, with nobody in the frame.
The short answer
A virtual model is built in two moves. You upload the garment photo as a reference image, you describe the person who should wear it, the pose, the setting and the framing, then you generate. Expect under a minute per visual, and a handful of tries to lock your formula. The output is only as good as the source photo: a creased, badly lit or angled garment gives you an approximate result. Everything else is method, and the method copies over from one product to the next.
What a virtual model handles, and what it does not
Image models that accept references read the overall cut, the dominant colour, the fabric and the large flat areas. They handle a plain dress, a tee shirt, a jacket, a coat or a knit very well, and they place the piece on a believable body with consistent folds. Across our own generations, fidelity is strongest on simple garments and solid colours. How these engines work in general is covered in our AI image generator guide.
Three product families still resist. Fine repeating patterns, tight stripes, houndstooth or lace, drift or change scale. Embroidered text and logos turn into smudges or invented words. Small elements such as earrings, zips and topstitching get simplified. When the selling point of a garment is one of those details, shoot that detail for real and let the virtual model carry the mood instead of the proof.
Two routes to an on model photo
There are two ways in, and the right one depends on your catalogue. Starting from the garment suits a single piece or a rushed delivery. Starting from the model suits a full collection, because you then lock a visual identity that comes back on every product page.
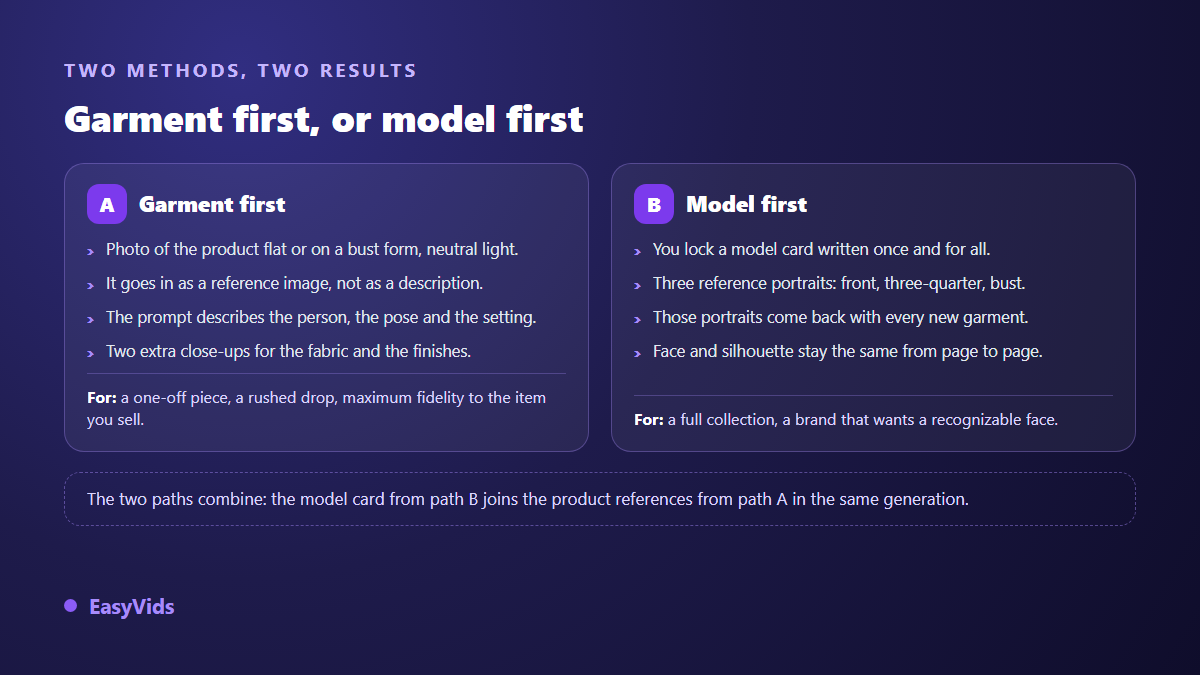
The two combine. Nothing stops you uploading, in the same generation, the garment photo and the portraits of your brand model. That is actually the most stable setup, as long as you stay inside the number of references the chosen model can read, between three and five depending on which one you pick.
The product shot decides everything
Five careful minutes on the source photo save an hour of retries. The garment has to be readable: laid flat or on a bust, lit from the front with indirect light, no hard shadow, no glare, shot square on so the proportions stay true.
- Steam or press it: a packing crease reads as part of the cut.
- Shoot in daylight near a window, never with direct flash.
- Use a plain light background that does not bounce colour onto the fabric.
- Frame the whole piece with a little margin on all four sides.
- Add two close ups: the fabric texture, and the detail that sells.
- Check the colour on screen before you upload, it corrects badly afterwards.
The prompt formula: six blocks, always in the same order
An on model prompt is not an inspired sentence, it is a spec sheet. Six blocks are enough, always in the same order. You keep the frame and change only the garment block from one product page to the next, which makes the work repeatable.
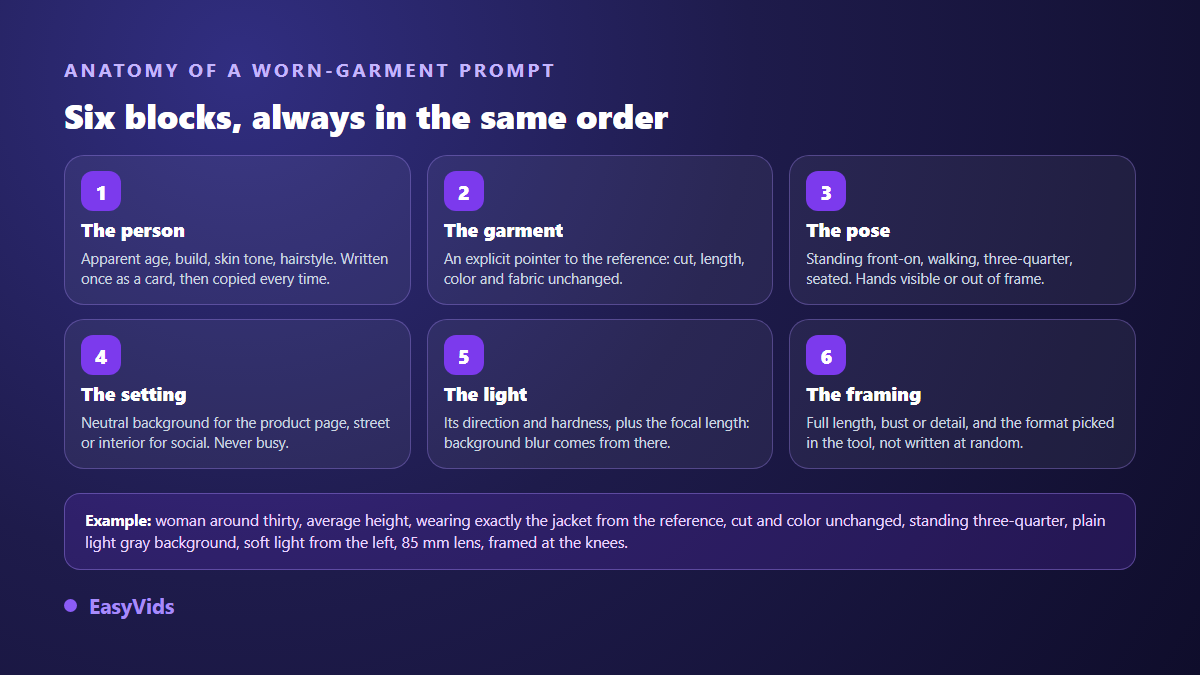
Two instructions matter more than the rest. State plainly that the cut, the length and the colour stay exactly as in the reference, otherwise the model takes liberties and lengthens a jacket or opens a collar. Then describe the person through general traits, never by naming a real public figure. For ready made formulas by product type, our fifteen product photo prompts cover fashion, beauty and food.
Keeping the same model across the collection
A shop that changes face on every product page looks like a stock photo pile. Consistency does not come from retyping the same description: an identical description gives a different face every time, because the model takes over everything you did not write down. It comes from stable references.
Three moves are enough. Generate your model alone on a neutral background until the face suits you. Keep three images of them: front, three quarter, bust. Feed those three images back as references on every new generation. That is the principle set out in our method for keeping the same character across images, applied here to a brand identity.
The fidelity check, before anything goes live
A good visual is not a pretty visual, it is a visual that describes the product the customer will receive. The gap gets paid in returns, poor reviews and occasional disputes. Get into the habit of opening the source photo next to the generated image before you save anything.
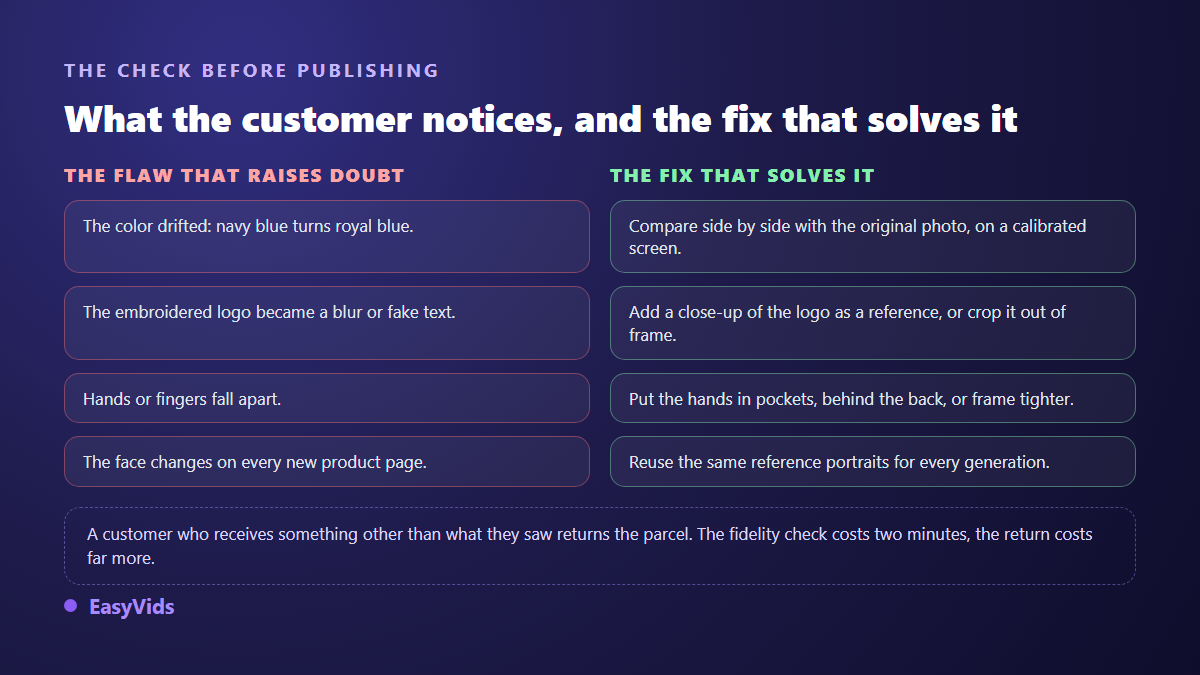
One point deserves extra care: body shape. Always showing your clothes on a very slim silhouette distorts how sizes are read and disappoints on delivery. Generating two or three body types for the same piece takes a few more tries and cuts size related returns.
Format and resolution follow the destination
Pick the format before generating, never at the crop stage. An image composed horizontally then cut to vertical loses the head or the feet of your model. In the studio the format sits in the generation settings, alongside the resolution.
- Online shop product page: square, or vertical for long pieces.
- Collection banner and home page: horizontal, with margin around the subject.
- Social posts and stories: full screen vertical, subject placed high.
- Printed lookbook or poster: the highest resolution the model offers.
- Marketplaces: their dimension rules outrank your habits, check them first.
Disclosure, rights and platform rules
Three questions are settled before publishing, not after. The first is likeness: using a real person's face as a reference without written consent is a fault, and the image being generated changes nothing. In France that right is attached to article 9 of the civil code, which protects private life.
The second is transparency. The European regulation on artificial intelligence provides, in its article 50, an obligation to indicate that image, audio or video content has been artificially generated or manipulated where it could pass as authentic, with application expected from August 2026. The YouTube help centre asks creators to declare realistic content generated or altered by AI at upload time, and the TikTok community guidelines require realistic AI generated content to be labelled. A short line under the visual, along the lines of generated visual with a virtual model, removes the ambiguity.
The third is the rule of the marketplace you sell on. The product image standards published on Amazon Seller Central require the main image to be a professional photograph of the product actually sold, on a white background, with no drawing or illustration. The safe habit is therefore to keep a real photograph as the main image, to use virtual models for secondary visuals and social media, and to reread your own category rule in the platform help centre, which is updated regularly.
The method inside EasyVids, screen by screen
The studio has no virtual try on button, and promising one would be a lie. It offers what matters: image generation conditioned on your own photos, with control over what reaches the model. Open the consistent characters page, upload the garment photo and your model portraits, pick a model that reads references, set format and resolution, paste your six block prompt, then compare with the source photo. When the chosen model cannot read references, the studio blocks the generation and charges nothing, instead of billing you for an invented garment. What each plan includes sits on the pricing page, and the free trial is plenty to validate a first product page.
Frequently asked questions
Do I need to cut out the garment before uploading it?
Not compulsory, but a plain background helps a lot. The model isolates the piece better when nothing competes with it, and the colour stays truer. A clean cutout keeps its value for the main product image, which often has to sit on white.
Does a virtual model really replace a photoshoot?
For mood visuals, social media and variations, yes. For a marketplace main image, for a piece whose detail justifies the price, or for a brand campaign, a real shoot still wins. The two approaches complete each other rather than compete.
Can I use a real person's face as a reference?
Only with written consent, and for the exact use agreed with them. Consent given for a photo session is not consent to generate unlimited images. Without a signed document, generate a face that does not exist: simpler, and risk free.
How do I show several body types without starting over?
Keep the same prompt frame and change only the block describing the person. The garment stays identical because it always comes from the same reference photo. Three generations give three silhouettes for one piece, which helps customers pick their size.
Should these prompts be written in English?
Recent models handle several languages well. English keeps a small edge on photography vocabulary such as focal length, raking light and depth of field. Writing in your own language while keeping two or three shooting terms in English is the practical compromise.
Start with one piece, the one that already sells best. Photograph it properly, write your model sheet, keep three reference portraits, and you hold a chain you can reuse across the whole catalogue. Creating an account opens the full image studio, and the EasyVids studio brings visuals, videos and variations together in one place.