Your video is online and something feels off. The picture looks flat, the audio hisses, the shots drag. So you start looking for ways to enhance video quality without buying new gear or learning a professional editing suite. Here is the first piece of good news: what viewers call quality depends far less on the camera than most people assume.
The second is that much of the work happens afterwards, in a browser, with nothing to install, exactly as described in our guide to editing video online. What matters is knowing which flaws can be fixed and which cannot. These nine techniques are ordered by how much they actually pay off, and this article is equally clear about where an editor stops being able to help.
The short answer
Work in this order: audio first, then lighting, then exposure and colour, framing, cutting rhythm, on screen readability, mixing, and export last. The first three account for most of the perceived improvement. Export never creates quality, it only preserves or destroys it. Exporting a soft source in 4K gives you a heavier file, not a sharper video.
Quality is decided at three moments
Every video goes through three stages, and each one leaves you a different margin. At the source, anything is possible but nothing is reversible. In the edit, a lot can be corrected, provided the information still exists inside the file. At export, you are only conserving, or damaging.
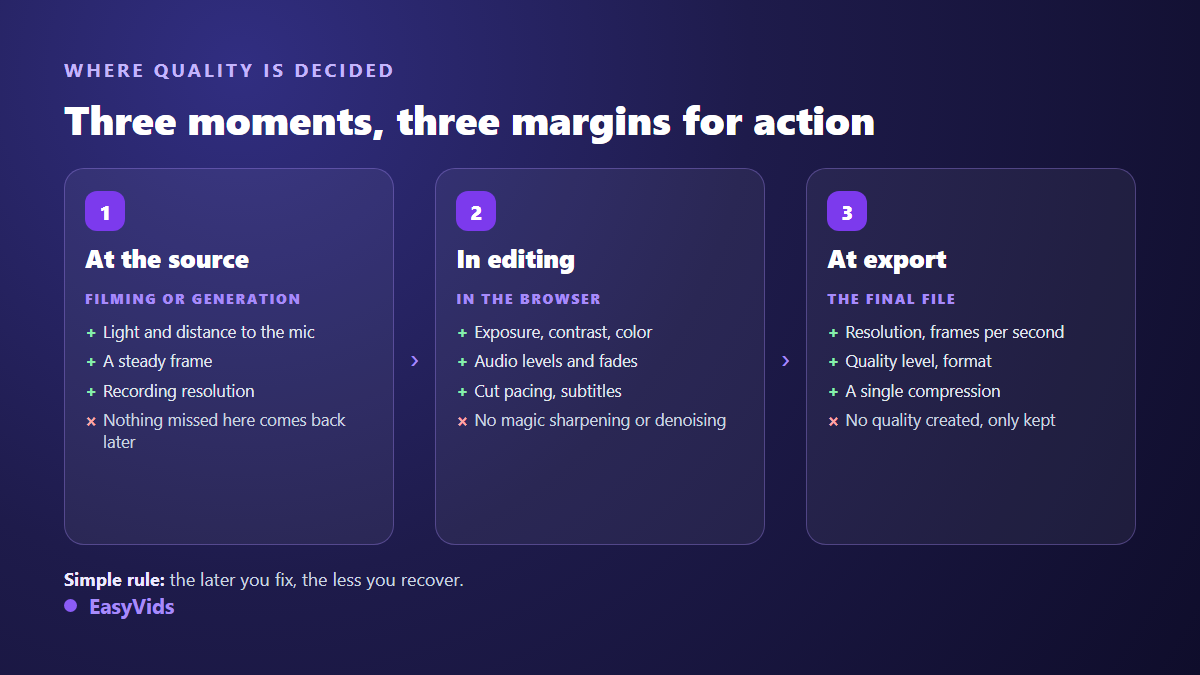
That grid saves hours. Before opening an editor to rescue a shot, ask which stage the flaw was born in. A lighting problem created during the shoot stays a lighting problem, no matter how many sliders you push afterwards.
1. Audio carries half the perceived quality
Viewers forgive an average picture. They do not forgive a room that echoes, a voice that clips, or levels that jump between shots. Fixing sound is the single most profitable correction, and often the only one you need. Move the source closer to the microphone, break up hard surfaces with a rug or curtains, and record without ever touching the ceiling: a clipped voice is gone for good.
When a take is unusable, re-recording the narration costs less time than patching it. A well configured synthetic voice beats a bad recording, which is the whole point of our complete guide to AI voice over.
2. Light matters more than the camera
Two identical phones produce opposite results depending on the light. In dim conditions the sensor raises gain, and that gain creates the coloured grain people blame on the lens. Put your subject facing a window rather than backing onto it, add a soft wide source, and avoid backlight that turns a face into a silhouette.
Low light also makes footage soft, because the camera lengthens exposure and the smallest movement smears. It is one of the causes we listed in our page on blurry video, and it is exactly the one no slider repairs later. Lighting costs a lamp. Repairing costs a reshoot.
3. Exposure and contrast, the two sliders worth knowing
A flat image is not a damaged image, it is an image where nobody set the extremes. Four controls cover most of the job in the EasyVids editor: brightness, contrast, saturation and hue. Start with contrast, until you get a true black somewhere in the frame and a true white elsewhere. Adjust overall brightness next, and only then saturation, in small steps. Skin tone is the most reliable reference you have, because the eye instantly catches a face turning orange or green.
4. Hold one colour direction from first shot to last
The classic amateur mistake is not the absence of a filter, it is a different filter on every clip. Viewers cannot name what bothers them, but they feel the lack of unity. Pick one look and apply it to the whole film. That is how the EasyVids studio works: the chosen look, warm gold, dark cinema, teal and orange, washed out or film grain, is applied across the entire edit rather than clip by clip.
What editing genuinely recovers
Plenty of tools suggest that one button repairs anything. The truth is simpler: an editor redistributes the information already in the file, it does not invent any. Whatever was destroyed at capture is gone.
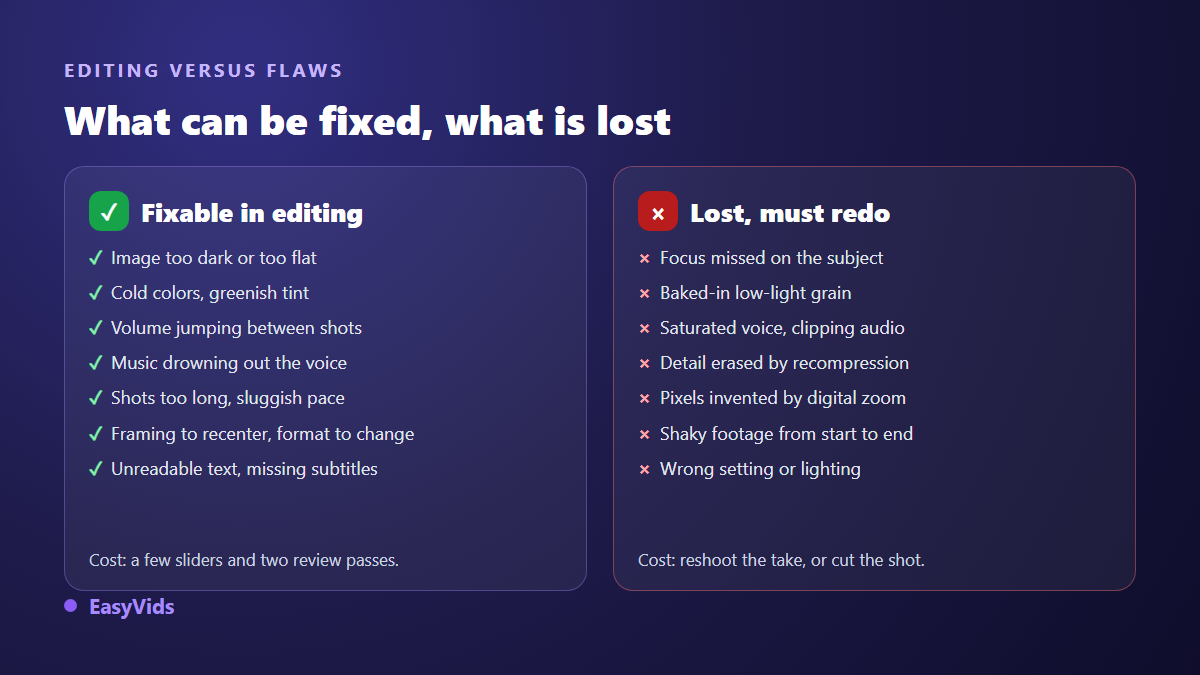
- Fixable: a dark, flat or overly cold picture, as long as detail still exists.
- Fixable: levels jumping between shots, music burying the voice.
- Fixable: sluggish pacing, off centre framing, a switch to vertical format.
- Gone: missed focus, low light grain, a clipped voice.
- Gone: detail crushed by compression, pixels stretched by digital zoom.
- Your call: a shot that shakes from beginning to end. Cutting it usually costs less than saving it.
To be straightforward about our own tool: the EasyVids online editor offers no artificial sharpening, no denoising, no stabilisation and no upscaling of low resolution footage. Those treatments promise a lot and usually deliver plastic skin or doubled edges. We would rather state the limit than sell a miracle.
5. Framing and output format
A clean frame makes a video look professional before the first sentence lands. Leave a little headroom without excess, place the eyes in the upper third, and clear the background of anything that pulls attention for nothing. Format deserves the same care: a video composed horizontally then cropped to vertical always loses something, often the subject itself. Decide the format before shooting or generating.
6. Pacing, the quality nobody names
Two videos shot on the same gear can feel worlds apart, and pacing explains most of the gap. A shot that runs three seconds too long reads as amateur work, and neither colour nor resolution compensates for it. Across our own edits, a comfortable range for a narrated shot sits between five and fifteen seconds.
- Trim the silence at the head and tail of every take, that is where the weight hides.
- Change shot on every new idea in the script, not on every sentence.
- Skip the automatic transition: a hard cut usually reads better than a repeated fade.
- Protect the first three seconds, that is where viewers decide to stay.
- If a shot serves neither the story nor the demonstration, delete it.
7. Readable text and captions that keep up
Most videos are watched on a phone, in a feed that often starts muted. Small grey type on a light background is unreadable, and text placed too low disappears behind the app interface. Go large, contrasted, short, with generous margins on all four sides. Captions do the same job, and our guide to automatic subtitles covers transcription, correction and burning them in. The EasyVids editor accepts an imported subtitle file as well as a transcription generated on the spot.
8. Mixing: voice in front, music behind
Mixing is the finish viewers hear first and creators rush last. Keep music clearly under the voice, around a fifth of its level. Add a short fade in and out on every track. Then match levels between sequences instead of pushing the master: the EBU R 128 recommendation, published by the European Broadcasting Union, aligns broadcast programmes on a shared reference level for precisely that reason. The EasyVids editor sets each element in decibels and applies fades per clip, which is plenty for a published video.
9. Export, the last place you can lose everything
A careful edit can be ruined in thirty seconds by a careless export. Four settings decide the outcome: resolution, frame rate, quality level and file format. Match the resolution to your source and never go above it. Keep the frame rate constant from start to finish, otherwise motion stutters. The quality level, meaning bitrate, often affects sharpness in moving shots more than resolution does.
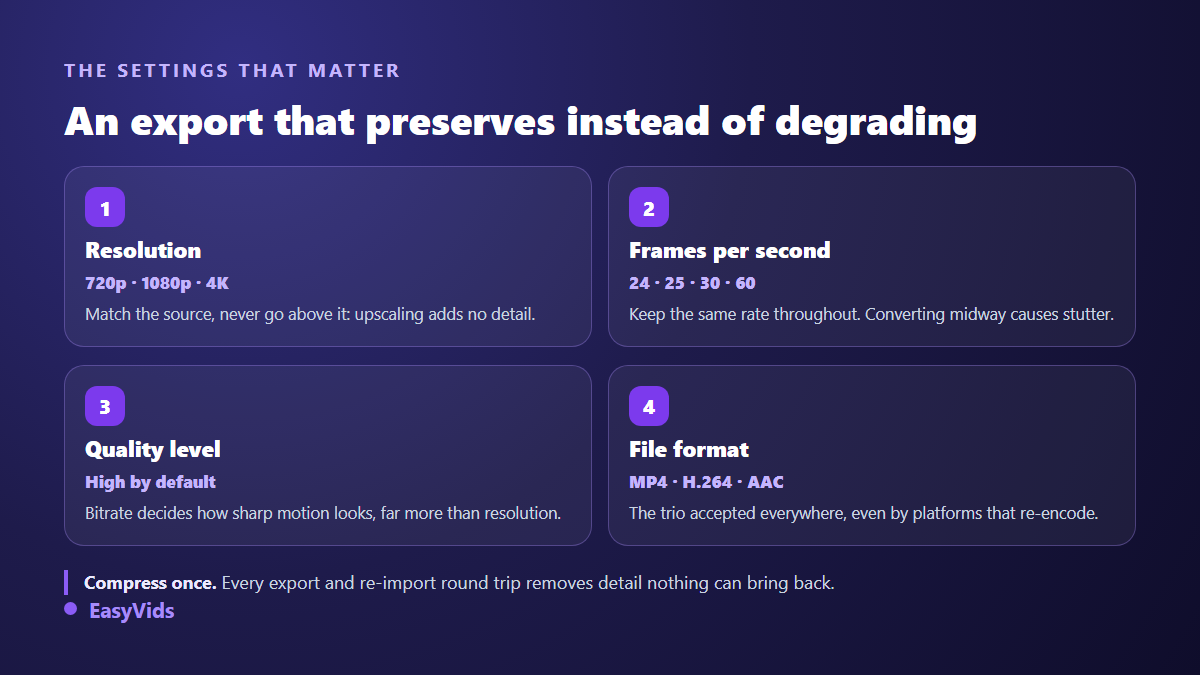
On the format side, the MP4 container with H.264 video and AAC audio appears in the recommended upload encoding settings published in the YouTube Help Center, and it plays everywhere else too. Remember that platforms re-encode every upload to build their own resolutions, so your file already goes through one compression you do not control. That is a good reason not to add your own by exporting, reimporting and exporting again. The EasyVids editor outputs MP4 in H.264 or WebM in VP9, with four quality levels and a choice of frame rate, while the studio's automatic edit delivers 720p, 1080p or 4K. Our pricing page covers the plans.
Frequently asked questions
Can you improve a video that has already been shot?
Yes, within limits. Exposure, colour, framing, audio levels and pacing all respond well after the fact. Missed focus, low light grain and a clipped voice do not: that information no longer exists in the file. Fix what is fixable, cut the rest.
Does exporting in 4K make a video sharper?
Not if the source is 1080p or lower. A 4K export simply stretches existing pixels: the file grows, sharpness stays the same. Go 4K when the source really is 4K, or when you plan a significant crop inside the original frame.
Do you need paid software to enhance video quality?
No. The corrections that pay off most, audio levels, exposure, contrast, pacing and captions, are available in free online editors, including the EasyVids one. Budget becomes useful for production, synthetic voices or generated visuals, not for lifting a dark image.
Why does my video look worse after uploading?
Because the platform re-encodes your file into several resolutions, and that compression stacks on top of yours. Upload a generous bitrate at your edit resolution, and avoid intermediate export and reimport cycles that put the same frames through compression twice.
Can AI generated video be improved the same way?
Colour, pacing, audio and export follow exactly the same rules. Shot resolution does not: it is locked at generation time. When an AI shot disappoints, regenerating the scene with a sharper prompt is almost always faster than rescuing it in the edit.
Video quality is not a hidden setting. It is a series of small decisions taken in the right order: clean audio, considered light, a colour direction held, tight pacing, a sober export. None of it requires new equipment. To run the whole chain in one place, from generating shots to the final file, create a free account and open the EasyVids studio, where the editor, voices, music and export live together.