The shot is good, the sound is not. Wind on the microphone, a conversation at the next table, a radio playing somewhere behind you, or your own voice hesitating through half the sentences. Learning to remove audio from video is one of the most requested editing moves, and it is the one most small online tools rush: they strip everything, in one block, without letting you decide what disappears.
The same request actually hides two opposite needs. Making a video completely silent, because it will run on a shop screen, inside a slideshow or within a longer edit. Or emptying the soundtrack to put something else in its place: a narration recorded in quiet conditions, music, a discreet room tone. Both happen in a browser with nothing to install, and our guide to online video editing covers the workspace where these actions take place.
The short answer
Open the video in an online editor, drop the file on the timeline, select the clip, then switch on Mute in the Volume panel. The sound stops immediately, the picture is untouched, and a second click brings it back. To delete the track rather than silence it, use the extract audio command: the sound becomes a separate clip you can erase with one key. Either way you are done in under a minute, export included.
Mute, detach, export without audio: three moves, three results
Tools tend to blur these three operations, which is exactly why publishing brings unpleasant surprises. Muting a clip acts on playback: the track is still there, it simply stops coming out. Detaching the audio turns it into a standalone clip you can trim, move, lower or delete piece by piece. Unticking audio at export time acts only on the file produced: your project keeps everything, the delivered copy carries no sound track at all.
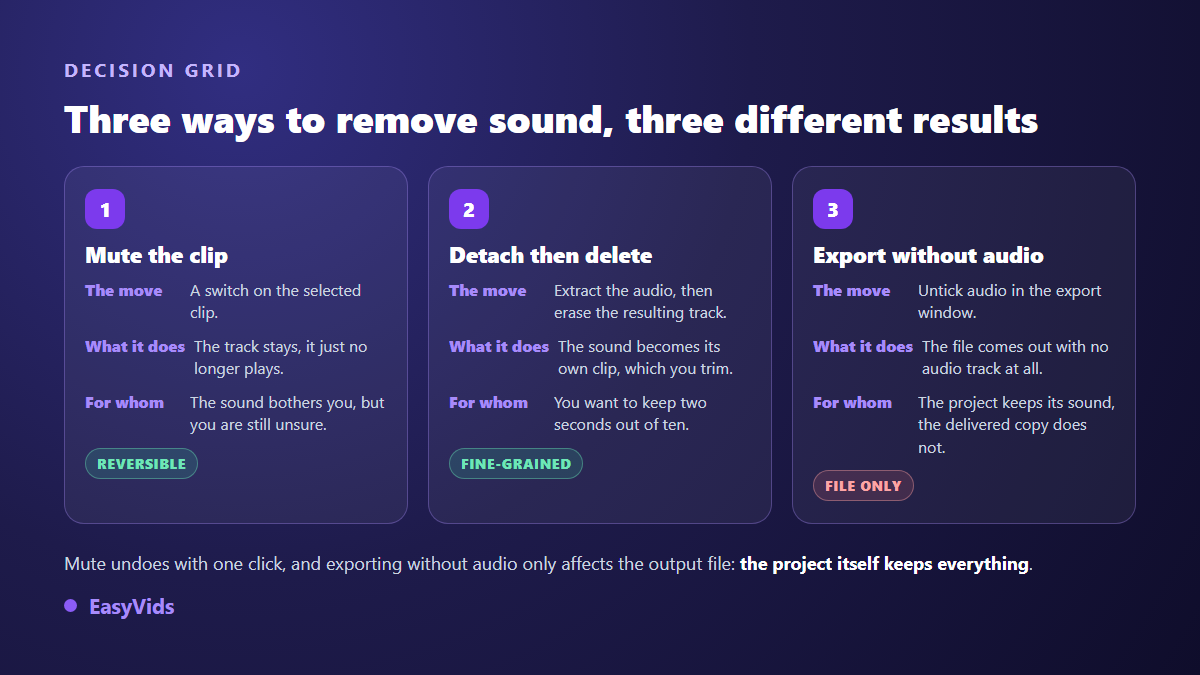
One question settles the choice: do you want to lose that sound, or only stop it from playing? If a laugh, a door closing or a single sentence deserve to survive, detach the track and cut inside it. If you are delivering a silent version of a video that also exists with sound, the export option is the cleanest: one project, two files, nothing to hunt for six months later.
How to remove audio from a video online, step by step
The procedure is identical on any device, because everything happens in the browser. Nothing to install, nothing to update, and the final file is computed by your own machine.
- Create a project in the editor, then import your file. Images, video and audio files are all accepted.
- Drag the clip onto the timeline. It arrives with its original sound.
- Click the clip to select it: the properties panel shows the Volume section.
- Switch Mute on, or simply pull the level down if you would rather keep a very low bed of room tone.
- Play the whole thing back, paying attention to the joins between shots, before you commit.
- Export, in MP4 for general use, and collect the file.
One caveat for phones: rendering relies on the browser's encoding layer. It is still missing on some mobile devices, iPhone and iPad in particular. Our editor tests that compatibility before starting the render and shows a clear warning rather than leaving you waiting for a file that will never arrive. On an affected device, prepare the edit on the phone and run the export from a computer.
Deleting the track instead of silencing it
Muting is enough most of the time. It shows its limits as soon as the original sound holds something worth keeping. A demonstration video produces useful noise: a mechanism clicking, liquid being poured, a spontaneous laugh worth more than any added effect. Cutting everything takes those seconds away from you, and you usually notice too late.
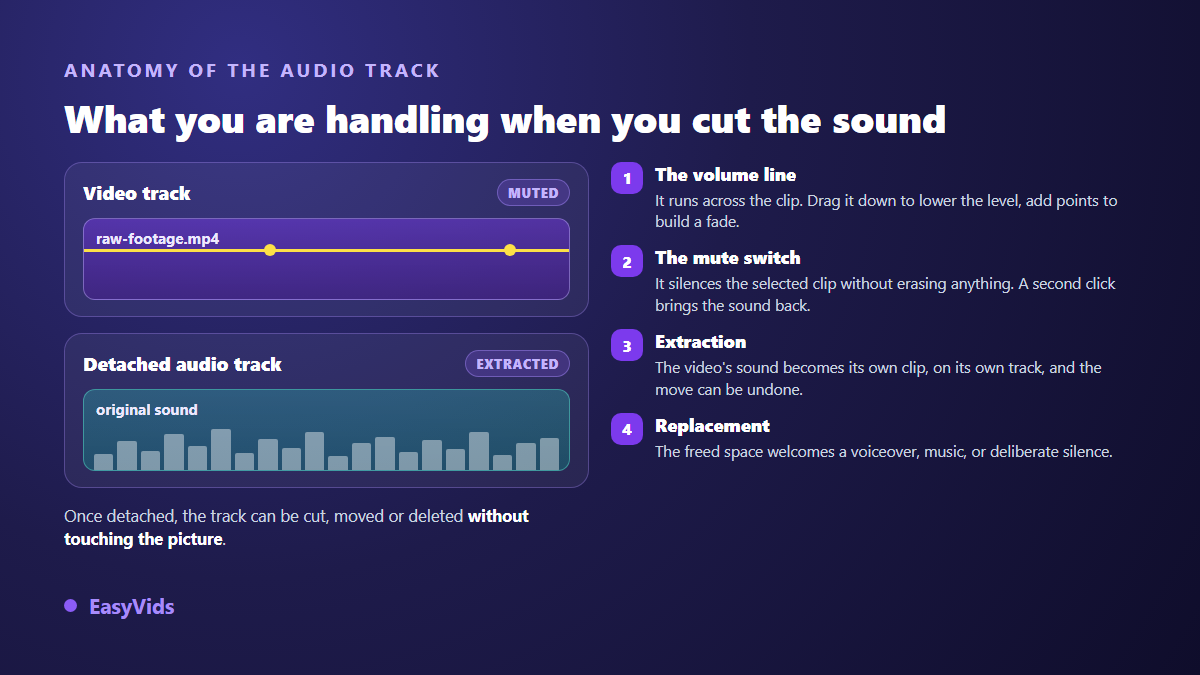
The extract command separates the soundtrack from the picture and places it on its own lane, aligned to the same position. From there it behaves like any audio clip: cut it, keep two seconds out of ten, move that fragment elsewhere in the edit, delete the rest. The operation reverses as easily as it applies, the opposite command reattaching the sound to its original clip. That reversibility is what makes experimenting safe.
Lowering the sound rather than cutting it
A video stripped of everything sounds oddly hollow. Viewers do not analyse it, but they feel it: the picture moves and the world makes no noise. Keeping the original room tone at a very low level, under a voice over or under music, is often enough to make the scene believable again. It is a matter of dosage, not a binary choice.
The level is set in decibels, from minus sixty to plus twenty in our editor, covering near silence up to a real boost. Six decibels down halves the amplitude of the signal: the drop is clearly audible without erasing the background. The volume line running across the clip does better than a fixed level. Drop points along it and you get a fade: room tone present at the opening, gone as soon as the narration starts, back again on the closing shot.
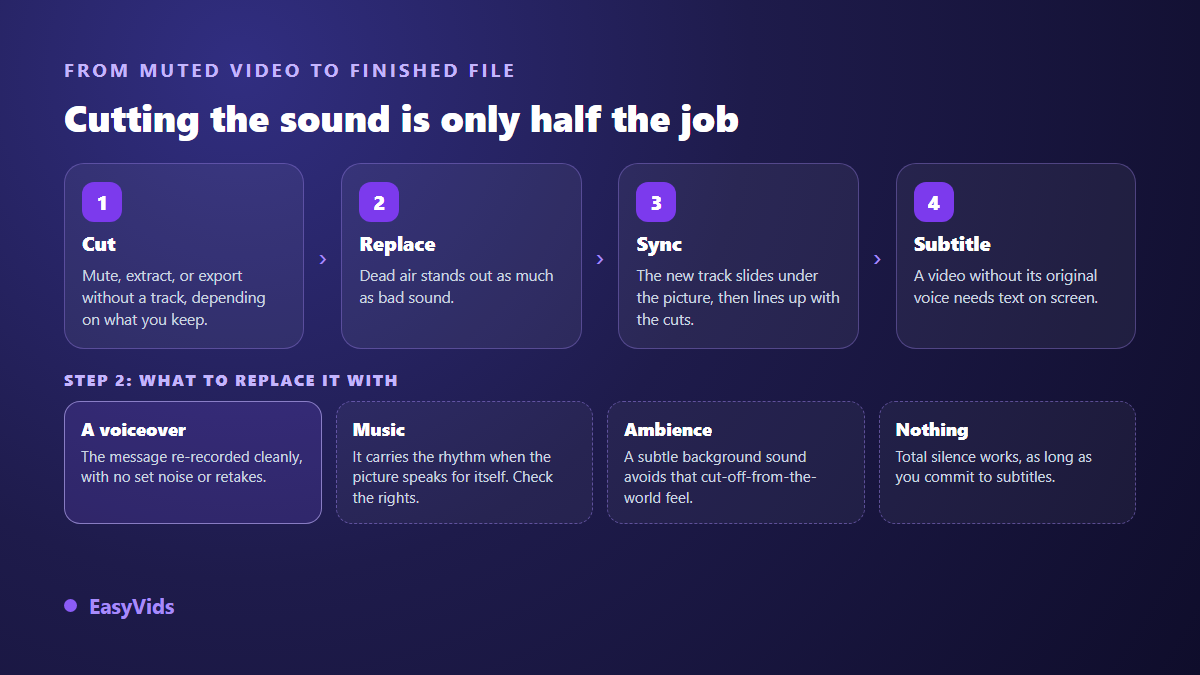
Replacing the soundtrack with a voice over
This is the most common case among creators: the footage is fine, the sound recording is not. Rather than shoot again, you rewrite the commentary and record it cleanly. A synthetic voice does that job with no microphone and no treated room, and above all with no retakes: a mistake is fixed in the text, not in the edit. The settings that separate a flat read from a believable narration are covered in our guide to AI voice over.
The workflow is three moves. Generate the narration in the studio, download the audio file, then import it into the project and slide it under the picture. What is left is timing, and that is where the result is won: the length of the voice drives the edit, never the other way round. If a sentence overruns the shot it belongs to, shorten the sentence before you stretch the shot. A clean mix keeps the voice in front and everything else well below it.
Replacing it with music without losing the video to a claim
Plenty of videos lose their sound because music was playing during the shoot. Cutting is the right call, but the replacement deserves the same care. According to the YouTube help centre, the Content ID system compares every upload against reference files supplied by rights holders, then automatically applies the policy the owner chose, from simple audience tracking to blocking the video outright. A track dropped in without checking puts you back in the exact position you were trying to escape, and what you are allowed to publish with generated music is worth reading before you pick one.
Three sources hold up. The sound library built into the editor, short but usable inside your projects. Music generated for the occasion, matched to the length and the mood of your video. Or your own recording, imported like any other file. Whichever you choose, listen to the full mix before exporting: a limiter protects the final output from clipping, it will not rescue music sitting too loud under a voice.
A video without its original sound needs captions
Removing speech from a video removes information. If your subject was talking, the text has to come back on screen in some form. The editor transcribes whatever audio remains and produces a caption file you place on the timeline, with automatic language detection or a manual choice when the recording mixes accents. The full method is gathered in our guide to automatic captions.
One thing changes once the video goes silent: captions stop being a convenience and become the only remaining channel. That means short blocks, strong contrast, and a position the app interface will not cover. The measured benefits of captioning, in reach as much as in watch time, are collected in this rundown of the reasons to caption every video.
Mistakes that show when the sound is cut
A video whose audio was removed carelessly is spotted within seconds. Six flaws come up again and again, and all of them are fixable before export.
- Total silence from start to finish: lay at least a very quiet room tone under the picture.
- Music at the same level as the voice: it has to sit clearly below, never competing for attention.
- Sound cut on one clip when the edit contains eight: check every element on the timeline.
- Joins that pop: a very short fade at the head and tail of a track removes the click at the cut.
- Captions forgotten, precisely when the original voice has just disappeared.
- Export launched without a full listen: checking costs the length of the video, and saves doing it twice.
Do you need installed software for this?
No, which is good news for anyone working on a modest machine. Cutting a track, laying another one, captioning, exporting: none of it requires an installed editing suite any more. An up to date browser is enough. The EasyVids creation studio brings the editor, the voice over and music generation together in one place, which spares you an intermediate export every time you switch tools. The trial is free, and the pricing page is the only reference kept current.
Frequently asked questions
Does removing the audio damage the picture quality?
No. In a video file the sound track and the picture track are independent: removing one does not touch the other. What can lower quality is the re-encoding performed at export. Pick the highest quality setting if the video still has to be worked on, and avoid stacking several successive exports on the same file.
How do I remove audio from a video on a phone?
The same way as on a computer, since the editor runs in the mobile browser: import the video from the device, select the clip, cut the sound. The one reservation is export, which depends on browser encoding support still missing on some models. In that case, prepare the edit on the phone and run the render from a computer.
Can I remove only the voice and keep the music?
Not in an editing timeline, and ours is no exception. A video carries a single sound mix: voice, music and noise are already blended together. Pulling them apart is specialised processing whose results vary a great deal with the recording. The reliable route is to cut the whole thing and rebuild the soundtrack element by element.
Can I bring the sound back after removing it?
Yes, as long as you are still inside the project: mute switches off, the extraction reverses, and undo walks you back. Once the video has been exported without an audio track, however, the sound is no longer in the delivered file. Always keep the original aside before you distribute a silent version.
Which format should a silent video use?
MP4 remains the default: every platform accepts it and it opens anywhere, including on televisions and display screens. WebM makes sense when the file is destined for a web page and you want a smaller weight. The format changes nothing about the absence of sound, only how the file will be read.
Cutting the sound is the easy part, and it takes under a minute. The difference is made by what you put in its place: a narration written for the ear, a room tone that holds the scene together, captions readable on a phone screen. Take one of the videos your recording ruined, rebuild its soundtrack entirely, and compare the two versions before deciding. Creating an account opens the editor and the voice over so you can test it on your own file.