You have six clips shot on a phone over a weekend, three takes from a shoot, or four separately generated scenes. Each one stands on its own, none of them tells the whole story. To merge videos online is to turn that scattered folder into a single film that plays straight through, with no black flash in the middle and no jarring cut between shots.
The job has a bad reputation, and for a fair reason: the real problems only show up after the clips are stitched together. One shot filmed upright among clips filmed sideways. Audio that doubles in volume at the third join. Sharpness that collapses on export because the file was re-encoded twice. This guide handles those in the order they appear. If browser based editing is new to you, our guide to online video editing sets the scene; here we cover one single action, end to end.
The short answer
To merge videos, open an editor that runs in your browser, import every clip at once, lay them edge to edge on a single video track in the order you want, then run one export. Three moves, a few minutes. Everything that follows is what separates a visible patchwork from a film nobody questions. The EasyVids online editor runs those three steps in a single tab, with nothing to install.
Joining, merging and editing are not the same job
The word covers three intentions. Joining means putting clips one after another, untouched, in file order. Merging implies the result holds together: one aspect ratio, one audio level, clean joins. Editing means choosing what stays and what goes, which takes considerably longer.
That distinction has a technical consequence. According to the FFmpeg project documentation, direct concatenation, the fast path that re-encodes nothing, requires files that match exactly in codec, resolution and frame rate. As soon as your clips come from different sources, a phone and a camera for instance, that path closes and re-encoding becomes unavoidable. An editor does that work for you, which is why merging runs through a timeline rather than a single button.
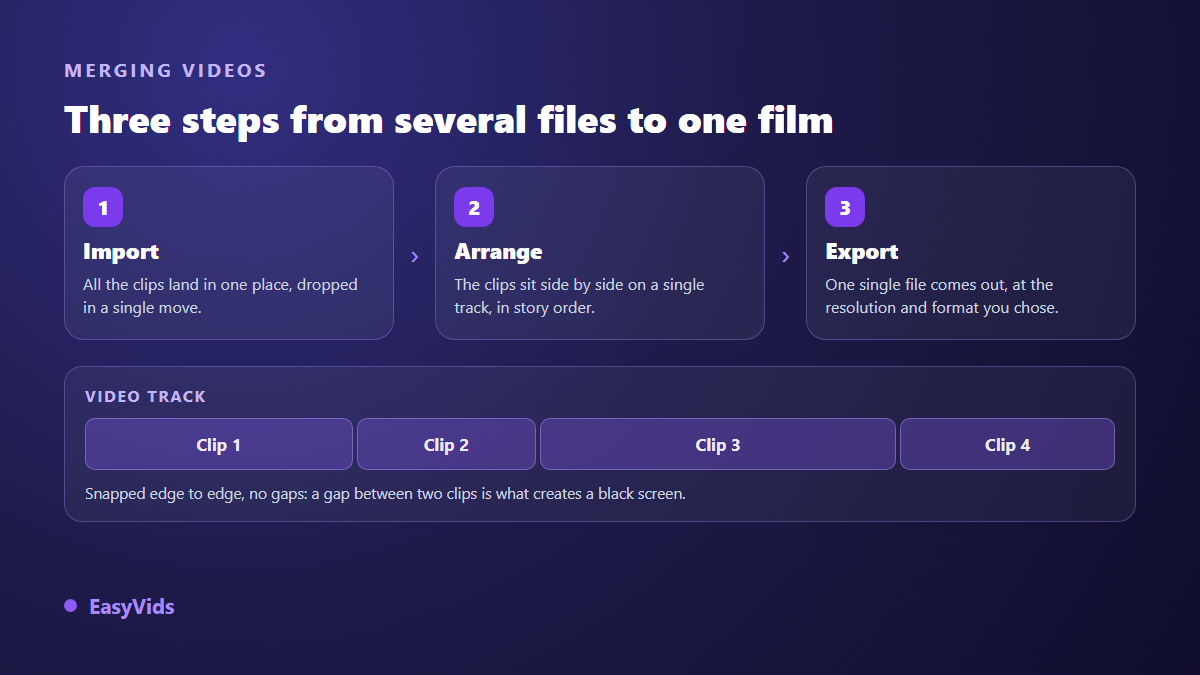
- Import. Select every file at once, or drag them in together. Thumbnails build while you work, so there is nothing to wait for.
- Order. Drag each clip onto the video track in narrative order. Snapping sticks it to the previous clip, and a shortcut turns snapping off when you need free placement.
- Export. Pick resolution and format, run it, collect one file. This is the only moment the machine really works.
A common mistake is stacking clips on separate tracks, one per file. The logic seems sound and the result is not: only the top track stays visible while every other one plays its audio underneath. Merging is a horizontal queue, never a vertical stack.
Trap one: clips that do not share an aspect ratio
This is the most visible flaw, and the most common as soon as files come from several people. A project has one aspect ratio, chosen once: landscape, portrait, square, or one of the two 4:3 shapes. Any clip that does not match has to be handled individually, otherwise black bars appear halfway through the film.
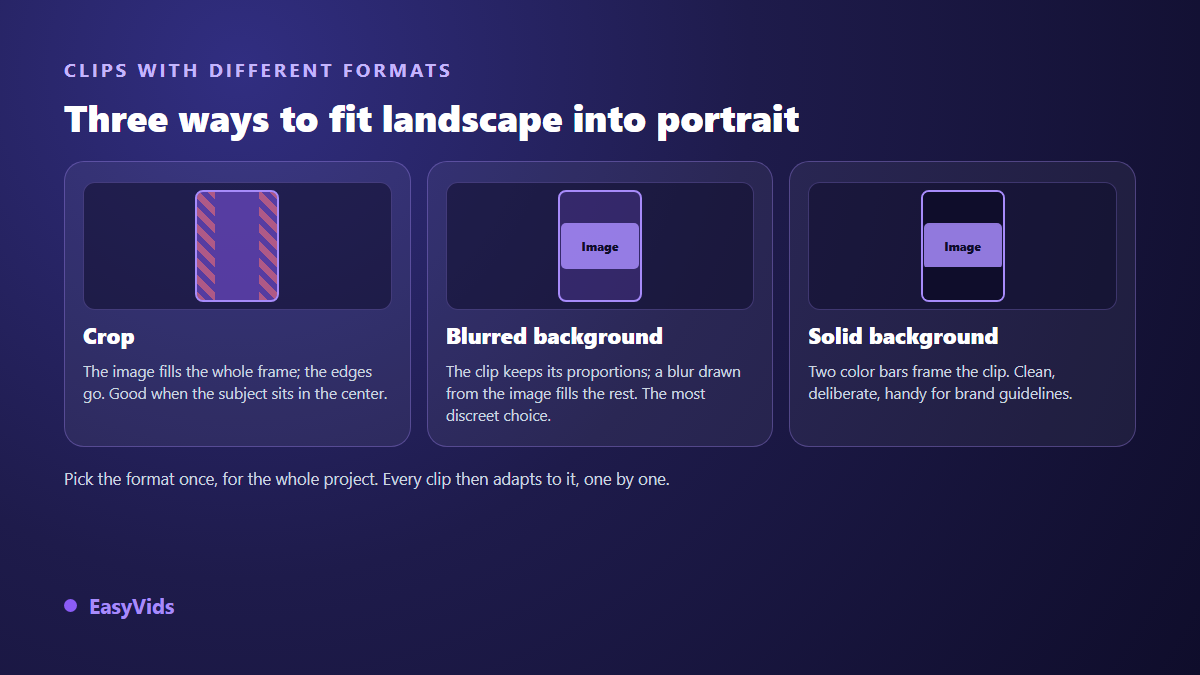
Three answers exist, and they mix badly: pick one and hold it across the whole film. Cropping scales the image until it fills the frame, at the cost of the edges. A blurred backdrop keeps the clip's own proportions and fills the gap with a blurred copy of the same image. A solid background does the same with a colour or a gradient, which suits a brand with recognisable colours. To choose the target shape for each platform, our reference on video sizes and ratios lists the exact values.
Trap two: audio that jumps at every join
An edit is judged as much by ear as by eye, and sound is what gives a rushed assembly away first. The clips were not recorded under the same conditions: one indoors, one outdoors with wind, one closer to the microphone. The viewer ends up riding the volume control instead of watching.
The fix is to set volume clip by clip, never on the master output. Play the film straight through on headphones and pull back whichever shot stands out. When a clip's audio is unusable, detach it and delete it: in our editor the sound of a video can be split from its picture in one click, which also lets you keep one shot's ambience running under another shot's image. A music bed underneath smooths the remaining gaps, as long as it sits well below the voices.
Trim before you join
Raw clips almost always start too early and end too late: a hand leaving frame, a second of silence before the first word, a camera move settling. Those spare seconds, multiplied by the number of clips, are what makes an edit feel slow.
Two moves are enough. Drag a clip's edge inward to shorten its head or its tail. Or park the playhead and cut: in the EasyVids editor, S splits the selected clip at that point, Q removes everything before it and W everything after. N toggles snapping, and Ctrl+Z always undoes the last move, so you can experiment without risk.
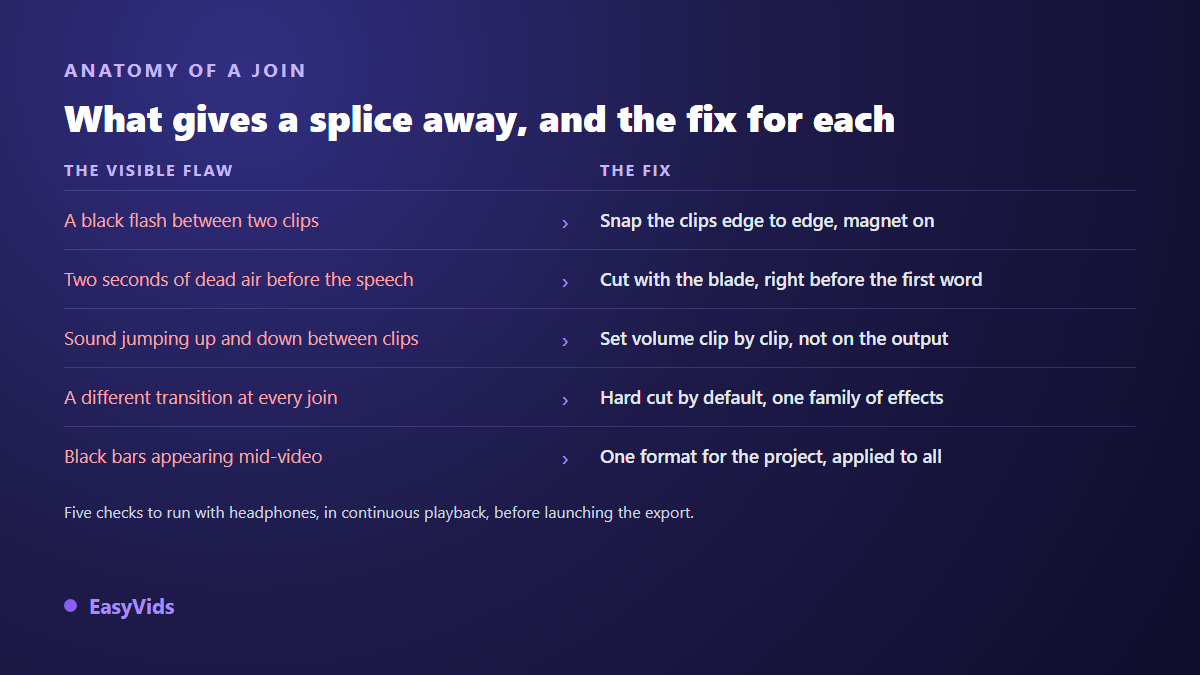
A good join has one signature: the viewer does not notice it. Speech carries over, the eye follows a continuity of movement or direction, and nothing flickers. When you hesitate on where exactly to cut, cut during a movement rather than during a still moment: the eye follows the motion and forgets the seam.
Transitions: the straight cut is still the rule
A cross fade between every shot is the surest sign of a beginner edit. In professional work the vast majority of joins are straight cuts with no effect at all. A transition earns its place when the story changes place, time or chapter, meaning a few times per video rather than at every shot.
Our editor offers eighteen transition families in three intensities, fifty four variants in total, plus an automatic pass that spreads animations and transitions across the clips while avoiding the same pattern twice in a row. Two things are worth knowing. A transition only works between clips that genuinely touch; leave a gap and the effect falls back to a plain fade to black. And once you have chosen a family, keep it for the whole film, or the result starts to look like an effects demo.
Merging without losing quality
Quality loss rarely comes from the edit itself, it comes from stacked re-encodes. Every time a file is exported, reimported and exported again, it goes through another lossy pass. So the rule is short: always start from the original files, do all the work inside one project, and export only once.
Then set the project resolution to that of your best clip, never higher. Blowing up a 720p shot inside a 1080p project creates no detail, it only exposes the softness. Two output formats cover every need: MP4, which every platform accepts, and WebM, lighter at comparable quality but less widely supported by consumer software.
One hardware note, because it saves wasted time. The export runs in your browser, on your own machine, so our editor tests the device before opening the export window and warns you when video encoding is unavailable. That is the case on iPhone and iPad, where browser based video export stays out of reach whichever browser you install. On mobile in general, memory limits how long a project can be. For a film of several minutes, a computer is still the right tool. In the same spirit, files recorded in HEVC, the default on many recent phones, sometimes preview incorrectly: convert them to MP4 H.264 before importing and the issue disappears.
Captions come after the merge, never before
Order matters. Caption each clip separately before merging and every later change shifts everything out of sync. Caption the assembled film once the final duration is settled. Automatic transcription can then handle the whole thing in one pass, leaving you only proper nouns to correct. Our editor transcribes on your own machine, without sending the audio anywhere, and also accepts an existing subtitle file. The full method sits in our guide to automatic captions.
Merging AI generated clips
Current video models produce short sequences, so a two minute film necessarily means merging several of them. The difficulty shifts from technical to visual: two clips generated from similar prompts rarely share the same light, the same grain, or even the same character. The seam shows instantly. Write all your prompts in one session with the same style wording, keep stable visual references from shot to shot, and be ready to discard clips that refuse to match rather than trying to rescue them in colour. Our guide to AI video generators covers that chain in full.
The checklist before export
Five checks in continuous playback, on headphones, full screen. They cost one viewing and save an export you would otherwise redo.
- No black flicker: the clips touch, with no gap left on the track.
- No unexpected black bars: every clip fills the project frame.
- A steady audio level from start to finish, with no peaks or drops.
- One transition family only, and no effect at every single join.
- Text and captions readable at small size, with enough contrast.
Frequently asked questions
Can I merge videos without losing quality?
Yes, provided you start from the original files and export only once, at the resolution of your best clip. The loss comes from chained re-encodes, not from the edit. A file that was exported, reimported and exported again has always given something up.
How many clips can go into one project?
There is no imposed maximum. The real limit is the storage your browser grants the site, since media stays on your device. Our editor shows the space available and warns before accepting a file that is too heavy, so you do not discover the problem mid project.
Do I need to install software to merge videos?
No. A browser based editor is enough, and it carries a quiet advantage: your files go nowhere, they are read and assembled locally. A recent computer with an up to date browser does the job, with no upload and no server queue.
How do I merge a vertical clip with a horizontal one?
Decide the final aspect ratio first, then adapt each clip that does not match: crop when the subject is centred, blurred backdrop when you want to keep the whole image, solid colour when your brand has one. Never switch ratio mid film, it reads as a technical mistake.
Is editing free?
Assembling, trimming, transitions and export all run in your browser and consume no credits. It is the AI generations, video, voice or music, that fall under the plans described on the pricing page. Merging your own clips carries no commitment.
Merging videos is not about powerful software, it is about order: one aspect ratio decided before anything else, clips trimmed before they are joined, audio levelled shot by shot, one export at the end. Take the files you already have and try it on three clips, just to test the method. Creating an account opens the full editor in your browser, and your first assembled film will take less time than reading this guide.